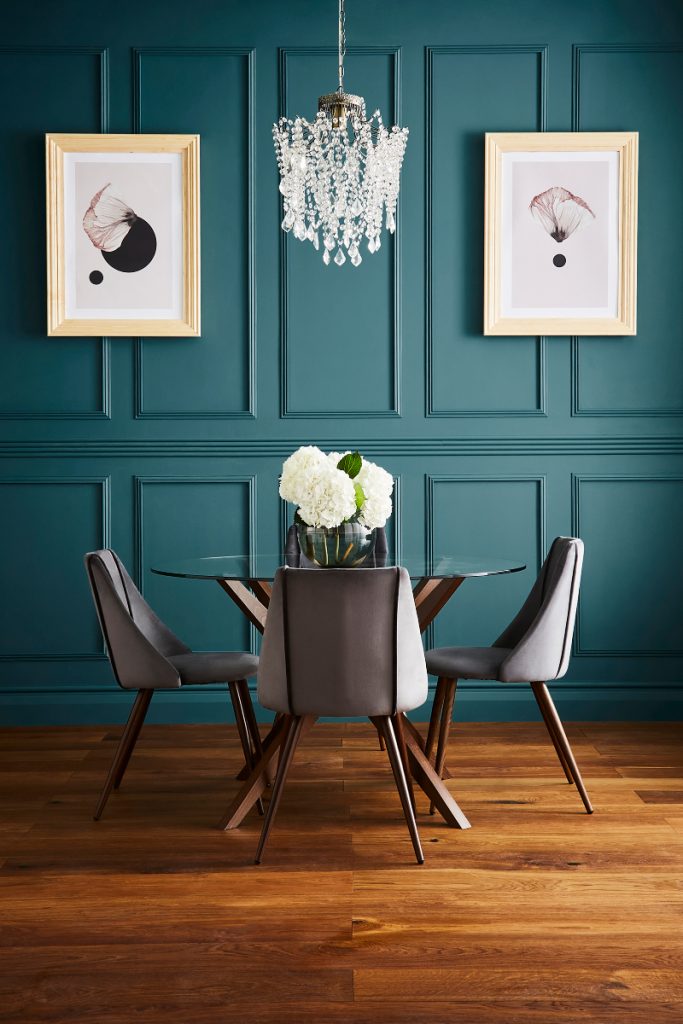
Thinking about your next DIY project? Forget wallpaper and paint and say hello to our wall panelling guide. Wall panelling is a classic decorating technique that looks oh so modern and is VERY popular right now. This durable method of decorating the walls in your home can easily add the WOW factor back into your space. And that’s whether it’s in the kitchen, bedroom or bathroom (or all three!)
So, are you looking to refresh your kitchen, bedroom or bathroom? Then I’ve put together an eight-step wall panelling guide to help you get the look right…
Wall panelling guide step 1: Decide what style of panelling you want
As you’ve probably already spotted while scrolling through social media, or when watching your favourite period drama, there are many styles of wall panelling to choose from. So, the first step is to decide on a style that works well for your home. For the traditional look, go for Shaker-style or short Victorian wall panelling. Choose ribbed panelling or cabin cladding to create a modern rustic design. Add a contemporary touch to your room with floor-to-ceiling slim wall panelling, or for Georgian-style panels to get that luxurious feeling. Have a look through the following wall panelling ideas to get your creativity flowing.

Measure your wall
Next up, grab your measuring tape and sketch out your design to ease the process later. The great thing about panels is that their sizes and widths are flexible and can come in various depths, from 6mm to 25mm. However, the width will depend on the total length of the wall you’ve measured. So, this step will help you decide on how high you want your panelling to go and on the size, width, depth and material of the panels. Take your time to really narrow down your options and make sure you get enough panels to cover your wall. Also, remember to consider the existing fittings and fixtures on the wall, such as sockets and wall-hung lights.

Make a list of what you need
Okay, you’ve got the style and measurements ready, it’s time to make a list. Depending on the style you’ve chosen, jot down…
- A saw, cutter and a spirit level
- MDF sheets or decorative mouldings
- Wood batons to create a frame
- Nails, pins and screws, or adhesive
- A hammer, screwdriver and a power drill
- Wood filler and decorators caulk
- Sandpaper
- Primer and paint
- And don’t forget about your protective equipment: mask, safety goggles and gloves
Cut, cut, cut...
Time to roll up your sleeves – cut your panels to the size and width of your measurements using a saw. It’s probably best to do this outdoors to help with the cleaning process once you’ve finished, or make sure to have a vacuum on hand. An easier option is to go for wood panelling for walls from Wickes, for example, which come in packs and a variety of sizes. Emily Black of Emily May Interiors says that “panelling is easily made from moulded MDF panels, which don’t shrink and expand like traditional tongue and groove panelling, and is fairly simple to cut and fit anywhere during or after a kitchen is installed.”

Prep your wall
Once you’ve got your panels sorted, sand the area you’d like to panel to make sure you get a perfect application with no bumps or uneven surfaces in the way.
Attach the panels
If you are panelling the bottom half of your walls, start by laying down the wood batons to create a frame, followed by the panels. This will help add dimension to your design. If you are going for a Shaker-style or Georgian-inspired design, use a pencil to sketch the form and then attach your panels. You can use screws, pins or even adhesive to lock your panels to the walls. This step will take precision and patience, so make sure you don’t rush when attaching the panels.

Fill in the gaps
Almost done – once you’ve got all your panels attached to the wall, take a close look to see if you’ve got any gaps in between or subtle cracks. Then, use decorators caulk or Polyfilla to fill them in and create a seamless design.

The finishing touch
Now that the hard part of this wall panelling guide is over, you can enjoy the last step – priming and painting your wall. While the primer is drying, think of the colour scheme you want to create. If you’re looking to create a moody atmosphere, go with a darker colour palette that can transform your room into a cosy cocoon. Or choose a light shade like a pastel to create a relaxing kitchen, bedroom or bathroom scheme. “Wall panelling offers a wonderful opportunity to get creative. For half panels, I’d suggest pairing contrasting shades – perhaps a deep navy or a forest green for the wood and a crisp white for the wall – as it creates a stylish and unexpected effect. If you have full-height panels, heritage shades such as muted blues, soft taupes or bottle greens will instantly inject refinement and sophistication to the space, giving it a more classic and traditional feel,” says Crown colour consultant Judy Smith.

Featured image: Go for a clean and simple style to panel the wall behind your bed. iStock/FollowTheFlow
Want more? Check out our feature on wall panelling ideas for your kitchen.


